Tuesday, 10 December 2019

Taking a Depth Year

 Photo by Syd Wachs

As 2019  heads toward it's end and 2020 gets ready to begin, my friends who participate in One Little Word have been writing about what's next for them.   What word will they choose, what word will choose them?

For quite a few of them their word next year will be DEPTH.  This article  at Raptitude.com was shared on the message board and it sparked a lot of thought for me.

It begins like this:

"I keep imagining a tradition I’d like to invent. After you’re established in your career, and you have some neat stuff in your house, you take a whole year in which you don’t start anything new or acquire any new possessions you don’t need.

No new hobbies, equipment, games, or books are allowed during this year. Instead, you have to find the value in what you already own or what you’ve already started."

That aligns with my husband's determination that by the beginning of July we will go through every box currently cluttering up the house and barn.  We will finally know what we have, what can be tossed or sold or completed!  He's pretty insistent and I'm glad.  I really do need the threat of dealing with my shit or watching as it gets tossed into a dumpster.  I mean, really.  Some of those boxes (mine and his) haven't been opened in 20 years and it's more than time to deal with the clutter and not having stuff hanging over our heads.

The article goes on to say that this new way of being would teach a person:

"...to live without regular doses of the little high we get when we start something new. If we indulge in it too often, we can develop a sort of “sweet tooth” for the feeling of newness itself. When newness is always available, it’s easier to seek more of it than to actually engage with ..." already owned craft supplies, unfinished art projects, fill in the blank from your own life.

When I read that I had an "ah ha" moment!  I love signing up for online workshops ~ art & personal growth are my favorites.  They are designed to let a person work at their own pace and really master the techniques.  They often go into depth and you get more than you would watching a youtube video (fun as many of those are).  They offer me the chance to learn and master something new!

But before I complete one course, I am often tempted to sign up for another one.  This happened last Autumn.  Two techniques I really wanted to master, two teachers I really enjoy, but I didn't allow enough time for either one.  Both classes are still unfinished.  

The idea of a "gap year" between high school and college has always seemed a great idea.  My youngest did this and the growth was life changing.  A friend's son likes the idea of a gap year between middle school and high school.  After I read this article from the director of The Stanford Center for Longevity, I thought maybe he has a point.  So this new idea of a "depth year," where I spend time on what I already own, know, want to master, sounds like a perfect blending of going deeper and expanding what a productive long life looks like.

Monday, 26 August 2019

Mastering the Layers, week 1


I really like gel printing!  I like the surprise factor of never knowing exactly what the print will look like.  Some of my prints I love.  Some, not so much.

Here are the prints I made during the first week's worth of lessons:

After I did the first day's foundational lesson, I kept playing.

These 3 prints were made after I discovered what happens when you try to make mud.  I wanted beige paint and knew I could make it by mixing the primary colors and white.  I mixed the colors on  a gel plate and then cleaned my brayer on a piece of paper.  What was cleaned off the brayer did not look beige.  I wanted to see if I could duplicate that effect purposely.  So again I put red, blue, yellow paint dabs on a gel plate, mixed them with the brayer, added white.  Voila, a pretty beige, at least that's how it looked on the plate. I added a favorite stencil and pulled off some excess paint.

These are the surprising prints.  Not very beige!


Day 2:

Grungy prints

Day 3:
 
Paint and stencil.
Paint, a piece of ribbed plastic, foam stamps.

I really like these prints.  There's a certain control, like maybe I could duplicate this.
The white and orange 6x6 gel plate in the corner is waiting for me to add something else,
though I don't know exactly what it will be.


Day 4:  Q.  What happens when you add lots of colors to the same gel plate?

 plate 1 --  first pull left, ghost print right

plate 2 -- first pull left, ghost print right

A.  Some interesting prints!

I'm using up a lot of old craft paint.  You know the kind -- on sale for 50c a bottle or 3/$1.  I've had some of it for a long time and it's time to use it up.  Not high quality paint, but it does make for some interesting results:  When I made this I hadn't figured out how to get less paint to come out, so these prints took a looong time to dry; if the paint isn't fully shaken it comes out separated; and the brayer slips and slides around if I'm not careful.

Day 5:  Q.  What do you do if you have an ugly or uninteresting print?
A.  Add more color and pattern!


 I made this print for the grunge lesson.
I thought I might improve it.

This looks less interesting than the original.
Sometimes "fixing" a print does not make it better.


And sometimes it does!

I love how vibrant this print it.
The camera didn't capture it all, but the background has a lot of very interesting green bits.


I learned about gel printing about a year ago when I watched a video on the blog at Joggles.com, where they sell the Gel Press printing plates.  Last October I saw that Carolyn Dube was teaching a gel printing class at Art-is-You, and it seemed the perfect time to try out this new technique. What a great introduction!

Mastering the Layers is Carolyn's 3 week online course which is greatly expanding my understanding of print making, how to use a gel plate, and, because it's Carolyn, FUN!


Friday, 16 August 2019

New Year, New Studio, New Class

Whether it's because September is the start of a new school year, or because so many of my childhood classmates celebrated Rosh Hashanah, this time of year always signals a new year to me.  I know it's only mid August, but I'm ready for the end of Summer and new beginnings.

We live in a large Victorian farmhouse that is too large for just the two of us.  The kids are grown and flown and only come home for the occasional garden clean-up weekend, Thanksgiving, Christmas.  We don't need this much house.

garden bed needing weeding

But a large house lived in by two packrats, has a large amount of stuff.  The process of getting it ready to sell is, well daunting, to say the least.  I have an art studio in the house (plus a barn full of creative and antique treasures).  My husband has stuff.  And over the years we have spread out, so there isn't a room without clutter!  All this has to be cleared out for the house to show to advantage.


cool stuff, but in such a cluttered state, who knows what's there!

A week ago I decided to move my art studio downstairs.  Where it was located was better viewed as a bedroom -- upstairs and near a bath.  Where I am moving is better viewed as a den and on the first floor.  It's a beginning nod to eventually staging the house.

Instead of moving everything that is art-related, I've just moved the supplies I use all the time -- paint, stamp pads, washi tape, glitter, paper, scissors, etc.  I figure if I don't move anything else in here for the next three weeks (except what I specifically need for projects and classes) it will help me clutter-clear the old studio, barn & various craft supply hiding places!  There are way too many of those in my life/house.  I have three tall IKEA bookcases and I am determined to fit everything I need in them.  If it doesn't fit, out it goes.  I need to be ruthless.


On Monday, I started a new online class called "Mastering the Layers," all about gel plate printing.  It was a great impetus to make the new studio a place I could work and learn .  Check out the link to see all about the class and a fun video with the teacher Carolyn Dube.

This is just the paper I used to clean off my brayer.  I love the colors and imagine with what I learn in class I will be able to turn it into something special.


Tuesday, 26 March 2019

Art Show at the Library

For the month of March there has been an art show at Brewster Ladies Library.
The show ends this Saturday.  These are my two pieces on display.

Four Seasons
16"x20"

I made the four panels on French ledger paper from the 1890's.
I wet the paper and added color ink to get backgrounds for each season.
I stenciled the tree trunks onto cream colored cardstock, cut them out and pasted them to the ledger paper.
  I used a coordinating stencil (both from Stencil Girl) to add leaves.
Then I added paint & paste embellishments.

Winter has texture paste thru a small dot stencil  for snow.
Photo a bit fuzzy, but you get the idea.

Winter was easy, Summer was easy, Spring took two tries to get the background and Autumn was a bear.  I actually made that panel three times before it looked right with the other ones!

I covered the edges of a canvas with more French ledger paper, painted the inside a tan color and glued my panels in to give it the look of a shadow box.


Birdsong

This collage was made on a book, whose pages were torn out.
Due to the way the Arts Council requires art to be hung  I couldn't add a hanger to the book.  So,  I glued the finished book to the front of a 20"x16" canvas, covered in more French ledger paper.

Here are a few close-ups of the piece:


My funny little steampunk birds


I was in the midst of Zero Procrastination, an online course taught by Karen Kingston, when these pieces were due.  And yes, I did wait til the last week and a half to start them.  What I didn't know is that the course would provide me the space to have a life-changing "ah-ha" moment, where I remembered when my procrastination began.  It's not something touted in the class info, I didn't expect it.  But having that realization allowed me to work on these pieces steadily and easily and get them delivered on time (in fact I was the first artist there!).

My usual refrain is, "I wish I had more time to ... (fill in the blank re project due yesterday)"  This time I was only sorry I didn't have more time because I was having so much fun creating!

Wednesday, 20 March 2019

My Supplies Catalog

This post was written specifically for the gals over at the GOC facebook group.  Thanks ladies for asking for more particulars! 

A couple years ago I saw a woman at Michael's with a book showing the art supplies she owned.  I thought the idea was brilliant and stored it away.

Then I discovered the Get Organized Challenge!  Steps 5 & 6 encourage us to make a catalog of our supplies.  There are lots of ways to do it within that course.  Remembering the portable catalog, I designed mine this way:

I purchased a traveler's notebook designed by Dyan Reaveley, including a cover, 4 blank books, 1 grid book and 1 dot-grid book. (click here for video of her showing how she uses it)


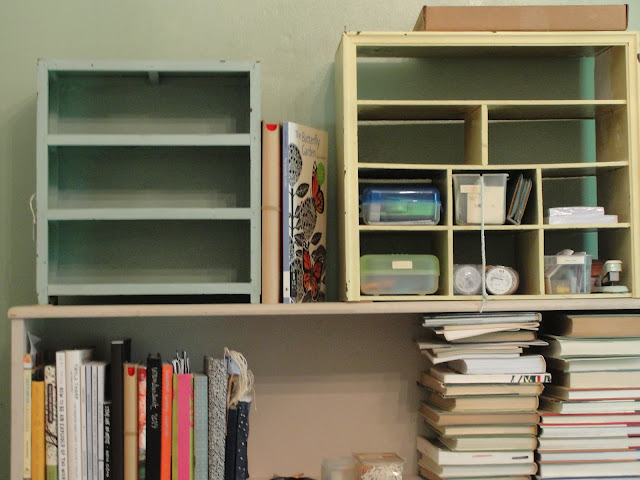
In my studio, this is the view from my worktable, usually without the catalog.  The pretty vignette makes a nice background though.


A couple of the
books lying flat,
inside and attached
to the cover.


The beginning of the notebook with all the books in it.


Each book is dedicated to a tool I use:  COLOR, STENCILS, DIES, STAMPS.  There's a skinny little book in the middle with my themes & sentiments list; info on scraprack pages -- their sizes, what I have -- and space to add an index.

Here's what the inside of the books look like:

Colors of Distress Ink stamp pads,
with a note whether I have a mini, reinker, oxide, archival.

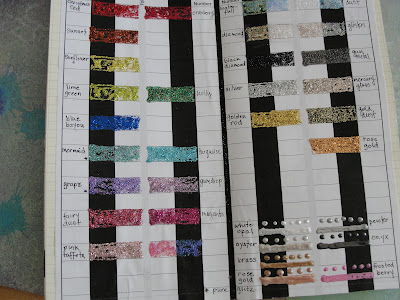
Using Peek-A-Hue charts, I sampled my glitter glue and Liquid Pearls,

Gelly Roll pens & Sharpie paint markers.

I also have similar pages showing all my colored markers; acrylic paint; spray ink; watercolor paint, pencils & crayons; washi tape; rayon ribbon (this book is not large enough to hold samples of all my ribbon), 

and glitter:

My trick for adding glitter without a complete mess ~
Cut a piece of double sided tape (mine are 1/2"), sprinkle glitter on one sticky side, put extra glitter back in its bottle,  remove other sticky side and affix to Peek-A-Hue chart.

Making the color book has been my favorite!

 "Heart in Hand" by Joggles

Who knew I had so many stencils?  I needed 3 books dedicated to stencils.
Tim Holtz and 6x6 individual stencils fit on a single page.  
Larger stencils take up a full page spread.

This set of  Stencil Girl stencils works together.

I had a lot of fun playing to create the above scene.
Also useful, getting to see them altogether!

One book is enough for dies and punches.
(at least for now).

Adding stamps to a book lets me see what I have.  I have a real weakness for stamps, specially on certain themes (birds, beachy bits, travel).  Now I can see I don't need any more  stamps on those three topics, tho I'm not sure it's gonna stop me from purchasing more!

I have also discovered  which stamps I will NEVER use!
They are now in the give-away box!

When I have a specific place for things (stencils, un-mounted stamps), I have noted that place in the book.
As I organize the rest of my studio I will make a note in my book where tools & supplies are kept.

It's been fun to play with my supplies, find out what works, what doesn't, what I will use and what I won't.  And when I'm stuck for what next to do creatively, I can always add something to my catalog.