Showing posts with label Making Art. Show all posts

Thursday, 20 August 2020

Stenciling with Seth Apter

Well, he wasn't actually here, but his designs were and  I loved using them!

 I use a traveler's notebook as a catalog for my art supplies.  Instead of putting samples in my catalog, last month I gathered the stencils and dies I have that were designed by Seth Apter and made this page in my art journal.  To get the full scope of this stencil I needed a larger space.  And his designs all work so well together, it was fun to use them to get creative.


I used acrylic paint for the stencils.  Book pages and gel prints from my stash for the die cuts.  The background is spray inks, water based stamp pads, and a generous amount of water spritzed on. 


 Close-ups of mixed media pages

I added my signature handwritten French paper scraps.  
Stickles and Liquid Pearls for  dimension.


This month's StencilClub from Stencil Girl is a mash-up between
Seth Apter & Mary Beth Shaw.
How could I not sign up?

Distress inks in rainbow colors applied thru the stencil

Scribble writing with dip pen & permanent ink.

There was so much juicy color left on the stencil, I spritzed it with water and laid the back side on the adjoining page.  Alone it didn't look like much, specially where the yellow inked images were.  But by scribble writing over the stencil, the light colors stand out and I got to write out some of the things that've been bothering me lately.

Monday, 6 October 2014

Day 4 -- Making Art

Our first project was a "petite keepsake journal"

Back in March, when I knew I was going on this trip I started an altered-book travel journal.  I used a commercially made  5x7" blank book with various pretty artwork already on the pages.  


 In keeping with One Little Word, I had the beginning pages focus on what I wanted from the trip:
being mindful . . . 

 . . . telling stories . . .


 . . . mapping my journey


 And for each part of the trip I made a separate section with what I knew of the itinerary, maps, names of participants and space to add photos, ephemera and commentary.

So for the keepsake journal, I thought I would make it an autograph book.


First design the front and back covers, then brush melted beeswax on the covers.  I've done this before and got a bit cocky, thinking I knew what I was doing.  It resulted in very rough, streaky beeswax.  Oh well.  It goes with the ocean theme. 
 Next attach the covers to a piece of black construction paper, sew the pages in with ribbon (I used woad dyed rayon),
embellish the ribbon holding it together and viola!

the finished book.


 Inside front cover


who, what, where, when


After my new friends wrote in it, I added paper bits that reminded me of them.  For some I am still searching for that perfect image to embellish their sweet words.

Mon 6 Oct

Friday, 30 September 2011

First Projects

Up the blue stairs to the top floor our group of art students went each morning to work.


Below are the cards I made:

These are the first projects we did -- collaged cards to send home to family and friends.  It was my first attempt to duplicate the sample.  In my failure to do so I discovered how naturally my own artistic sensibility comes through.  And since I was so very pleased with my completed cards, I also learned I might, just maybe trust my artistic eye!


For my friend Jan
Art Reference Librarian
you will be sorely missed! 


Tuesday, 28 December 2010

Giving Back A Little Sunshine


I've probably mentioned this, but I love going out to lunch --  when my husband is free we have favorite places; doing lunch with a girlfriend is a treat; and getting to eat out by myself where I can sit and read a book can be a real highlight to my week.


A couple times a month I eat out at a restaurant next to the closest Michael's.  I've gotten to know one of the waitresses.  There are all sorts of reasons we hit it off.  She is a good listener.  We both like to read.  I've suggested books for her to read.  She has a favorite series and said I might like it.  I read it, I liked it, I told her so.  It's fun to talk books together!  I always ask to sit in her section and she seems genuinely pleased when I come in.  She is such an upbeat person, it's nice to see her when I eat there.


She & a friend are going to Hawaii for the winter and I wanted to give her a little bon voyage gift.  Having a daughter her age, I know -- cash is always welcome.  My friend Mary made creative holders for gift cards and a holiday gift book and they inspired me to be creative in the packaging of my gift.

Front of card
I love the snapshot.
The beauty in the canoe seemed apropos!

Open to Inside
All sections of the tri-fold card.
I used walnut ink, distress stamp pad ink applied with Ranger blending tool & foam, rubber stamps, printed tape, markers, ribbon, a MS border punch, vintage paper, rhinestone strips.

The glittery ribbon holds the money.
I cut a strip in the card, laced the ribbon through and taped it in place on the back.


Compartment to hold bills is closed.

I went to the restaurant today for lunch.  She said she was hoping I would come in today as tomorrow is her last day -- so sweet.  I gave her the gift, and she was so pleased.  It was wrapped up and she didn't open it while I was there.  I figured she might like to open it by herself.  I'm terrible at getting gifts, but I love giving them, specially when it's to someone who is so nice!

Monday, 4 January 2010

A Holiday from "shoulds"

I am going to be taking a holiday from blogging in January.


I know I have that button, "blogging without obligation," but really, it doesn't work! I still feel like I ought to blog more regularly.

A therapist I know has a business card with all the usual stuff on the front and on the back is this line
Don't Should On Me!

I'm taking blogging out of the should category. Recently I've felt I wasn't always me when I've posted and I'd like this space to be both pretty and real.


Usually I don't make New Year's Resolutions, but this year, while soaking up the sun in the desert, I thought I would get more organized, get rid of the excess stuff I have collected over the years,** blog more, stop leaving my studio and shop in such a mess, make more art. You know the list!


What seems do-able sitting on a bench in the sun doesn't always seem so easy under grey skies and with all the stuff at home that yells at me: 1000's of inches of wallpaper to strip, boxes and boxes and boxes of stuff to sort thru, laundry, papers to file.**

Something had to go. As much as I love blogging, I realized I needed to revamp 3 really important areas of my life, and the blog was one of them. The other two are getting the shop ready to re-open in March, and designing a studio I can really create in!

So I'm taking my creative life on as a full-time job, 9-5. I have no idea if I can do this. I would much rather sit down and read a book than do anything else. Shopping & going out for lunch are easy! Getting into the shop/studio is tough. Staying there all day is almost impossible. But if I don't do it now, I'll never do it. I have so many beautiful ideas. I know I have taste. It's the Nike slogan
Just do it!

Feel free to leave comments or send emails. I will respond to all of them. I'll also let you know when I'm back.

~Marilee


**While on our trip both my kids asked if I had seen the TV show Hoarders. My daughter was glad to discover hoarding is a "thing;" that other people have trouble with holding on to things. The kids said they didn't think I was that far gone, but perhaps I ought to watch it as a cautionary tale. They're right. I'm not a hoarder, but I do have too much stuff and it's tough to get rid of it.

Saturday, 17 October 2009

Its All About Me

To see Natasha's post and the other participants, CLICK here!

When I signed up for this blog party, I had no idea what I would do. I just knew it would be good to do something for me.

Then my local scrapbooking store sent an email telling me about a day long crafting event called "Stamptoberfest." The projects looked terrific, and I signed up, realizing it was the perfect "all about me" day! For more about fun activities, check out {creative chick headquarters} These are some of the wonderful ladies behind the day.


My schedule.
It was a great day. There were 5 teachers/5 classes. The students were divided into groups and went from one table to the next.


There were signs for each station, but I'm afraid this is the only one I snapped. Once we got going it was fast & intense and I was just glad to keep up.


My Tin Woman


We used plastic templates and rubbed the metal over them to add designs, then sand papered it to bring out the details. Because each class section was just 45 minutes, the teachers did a lot of prep work, including covering the legs with dictionary pages & painting the boots, arms, wings.


This is Erin & Melissa M.
Melissa taught my next class. We made a very wonderful pin out of a stamped image and swarovski crystals. You notice there is no photo? I gave the pin to my daughter and forgot to take a snap. I'm pretty sure she likes it, as it is a paisley shape and autumnal colors.
I loved how it turned out.

Erin took lots of photos of the day, staffed the register & rang the bell to keep us all on track.
She teaches at Colorful Creations for other events.


I always thought making charms was difficult. You had to solder and probably burn yourself (I have worked with glue guns and know about burns) and maybe have 2-handed coordination (I'm so awfully right handed).
NOT SO!

We got 3 kits for charms. We had time to make 2 and the one above is awaiting me.

These are the charms we made.
I learned how to use distress stamp pads to color tags & how to put these charm pieces together (no soldering needed). The teachers are so creative. The little charm on the left has tiny beads, starfish & shell shaking around. The fishnet was a great touch.


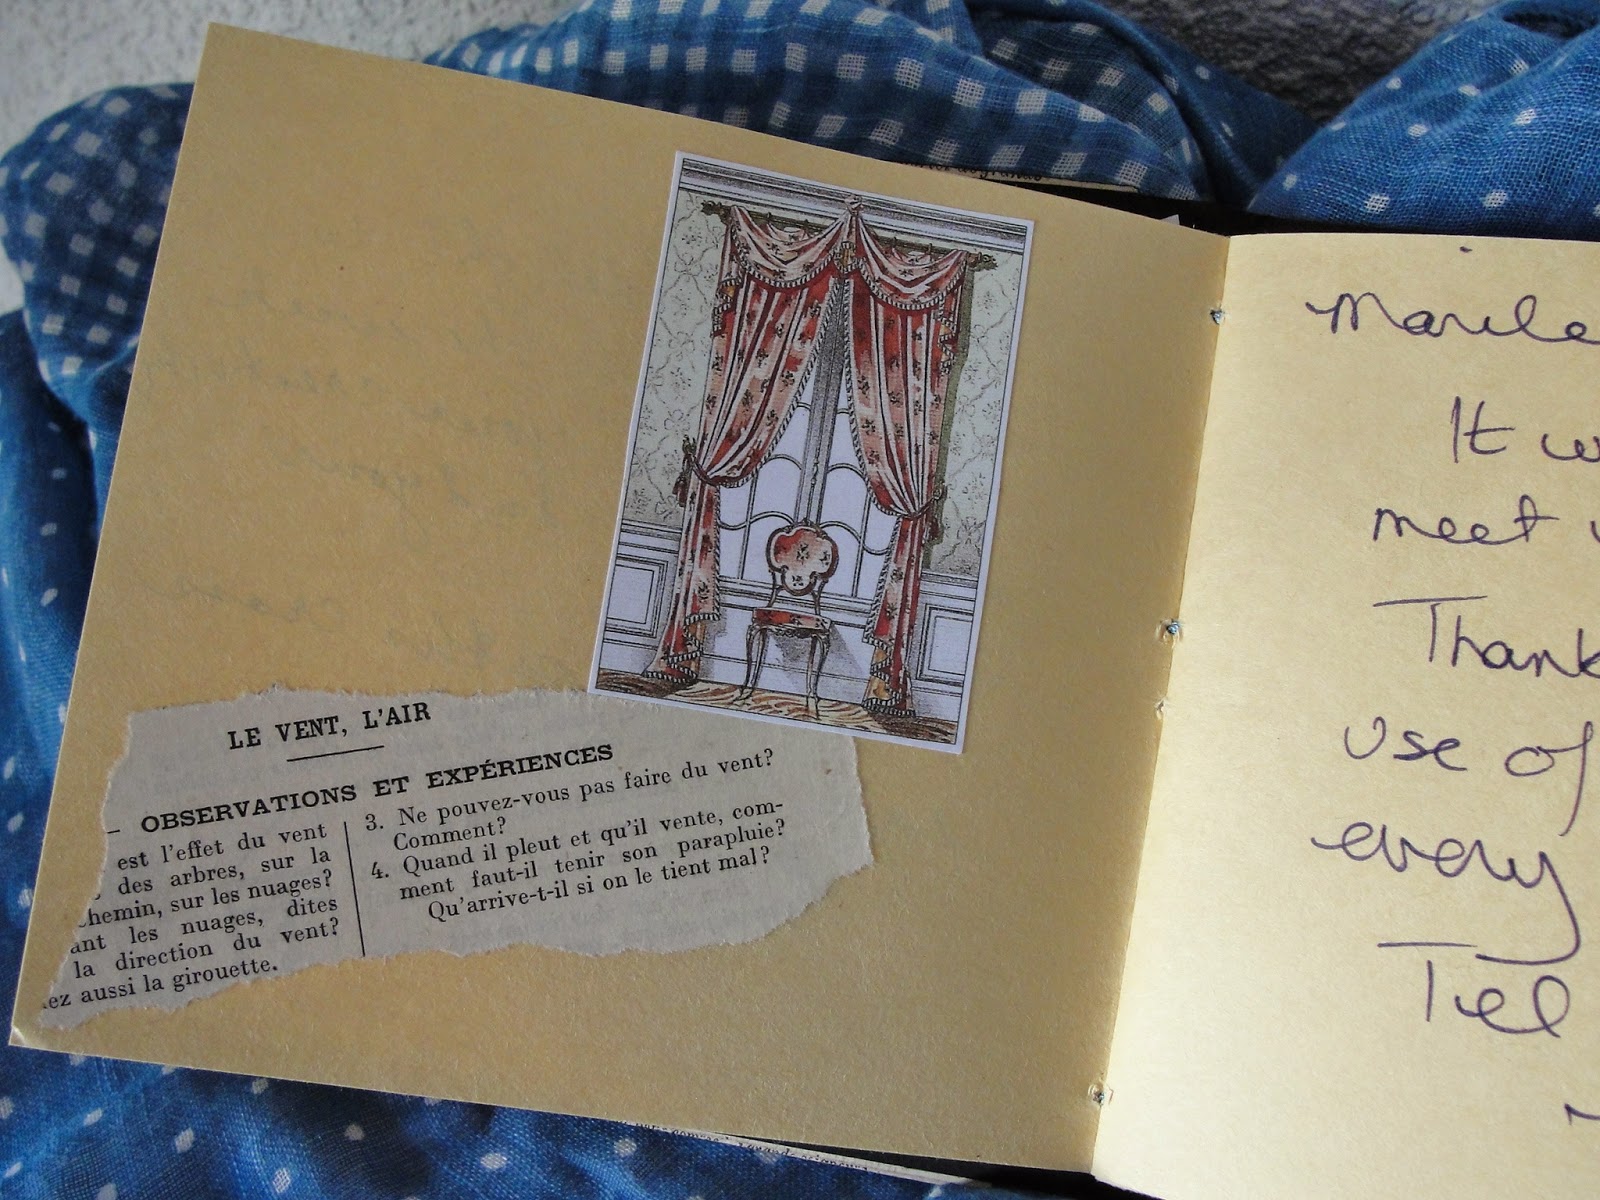
The next class was twice the time so we could make a tag book.

My finished book

I'll tell you a secret. The metal pieces the ribbon is strung thru are one of those mothers of invention things. I made a mess punching the holes and ripped the cover. Those metal pieces were part of the kit, I string & glued them and viola, no tears showing!

Inside of Tag Book.

Tags in a row.


No drawing required!
This was all done with stamps, watercolor pens & brush.


Thank you Natasha for hosting this lovely party. I had such a good time at my day of art. I learned lots of new techniques. I discovered my ArtBin is useless for holding supplies at this kind of event, and if I can swing it, I want to get a better camera for Silver Bella. Who would guess so much great knowledge would come out of planning a day all about me?